How to put in a sauna heater?

After purchasing a home sauna, many people face the problem of installing it. However, it offers years of leisure and health benefits. To be more specific, plugging it into a wall outlet is not enough. It doesn’t matter whether you are building the cabin yourself or renovating an existing room. So, you need to understand how to install a Harvia sauna heater. Otherwise, something could go wrong or even catch fire. Of course, the Harvia brand is a world leader in sauna technology. Although its products are reliable, it is the accuracy of the installation that determines how quickly the room will heat up. The service life of spare parts also depends on many factors.
Practical guide for installing an electric heater
Honestly, the process begins long before the device arrives at your home. Firstly, you need to make sure that the power supply meets the requirements of the appliance. Most electric heaters require a special 240 V circuit. The wire cross-section must correspond to the rated power of the heater in kW.Once these requirements are met, you need to focus on placement. But how to install a Harvia electric sauna heater? Especially at a “minimum safe distance.” Every instruction manual has this point. In truth, there are several parameters here.
This is the distance between the heater and the wooden walls, floor, and ceiling. Even a small error can cause the wood to char or the upper limit sensor to trip, which will turn off the device. Once you have dealt with this, move on to the next point. This is preparing the surface for installation. For beginners, this can be a real issue. Remember that the wall must be reinforced. Most wall-mounted models come with a metal bracket. This bracket must be screwed to the wall studs. A common mistake is to use thin cedar paneling. Eventually, it could support the weight of the heater plus 20–40 kg of stones.
Typical faults and tips on avoiding them
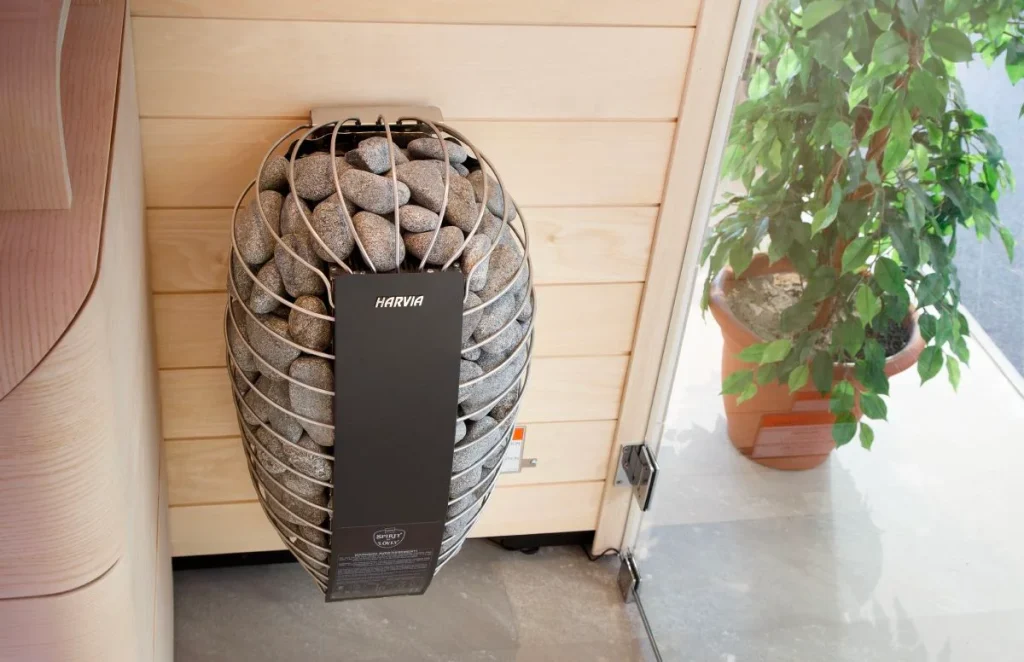
Even with the instructions at hand, mistakes are inevitable. One of the most common mistakes after purchase is incorrect placement of the temperature sensor. This is when the sensor is placed too close to the heater or directly in the path of steam. Then you will see falsely high readings, which will cause the device to shut down. Even though the room was actually still cold. Instead, placing the sensor in a cold corner will cause frequent overload cycles. An additional concern is the “packing” of the stones. Most people, without thinking, pack the stones as tightly as possible.
Until the elements are completely covered. This is a mistake. The stones should be placed loosely so that air can circulate between them. Without this airflow, the heater will overheat and the internal safety switch will trip. Eventually, a classic mistake is dust and dirt on the stones. They must be wiped clean before installation. If you don’t clean them in time, the dust will burn, creating an unpleasant odor and potentially damaging the sensitive electronic components of your device.
List of steps for a perfect installation
For successful set up, several important points must be taken into account. Let’s take a closer look at some of them. Because otherwise you won’t be able to understand that you are on the right path.
- Reinforce the wall. Make sure that the mounting bracket is attached to structural studs, not just decorative wood paneling.
- Check the distances. It won’t hurt to remeasure the distance to the benches and walls with a tape measure. After all, it’s better to seem strange than to pay for repairs after a fire.
- Use the right electrical equipment. Obviously, connection to the heater is only possible with silicone cables. They are capable of withstanding high loads.
- Calibrate the sensor. Place the thermostat sensor exactly as described in the instructions. This is usually on the wall above the heater, at a certain distance from the ceiling.
- Lay the stones correctly. Do not lay them too tightly. Make sure that the elements are covered, but air can still penetrate.
- Consult a specialist. Although anyone can do this task, it is advisable to hire a specialist for diagnostics
Be ready for joy.
The entire process, from buying to relaxation, takes only a few hours. All you need to do is take the time to understand how to install Harvia sauna heaters correctly. In fact, this is an investment in the safety of your home for many years to come. Additionally, this can help you save money on winter heating. If you do everything right, there will be no noise, uneven heating, or significant energy. To do this, you need to have tools or spare stones on hand. Our team is ready to provide turnkey assistance without unnecessary expenses. Of course, you will find everything from heat-resistant cables to premium stones. Start your vacation right now!